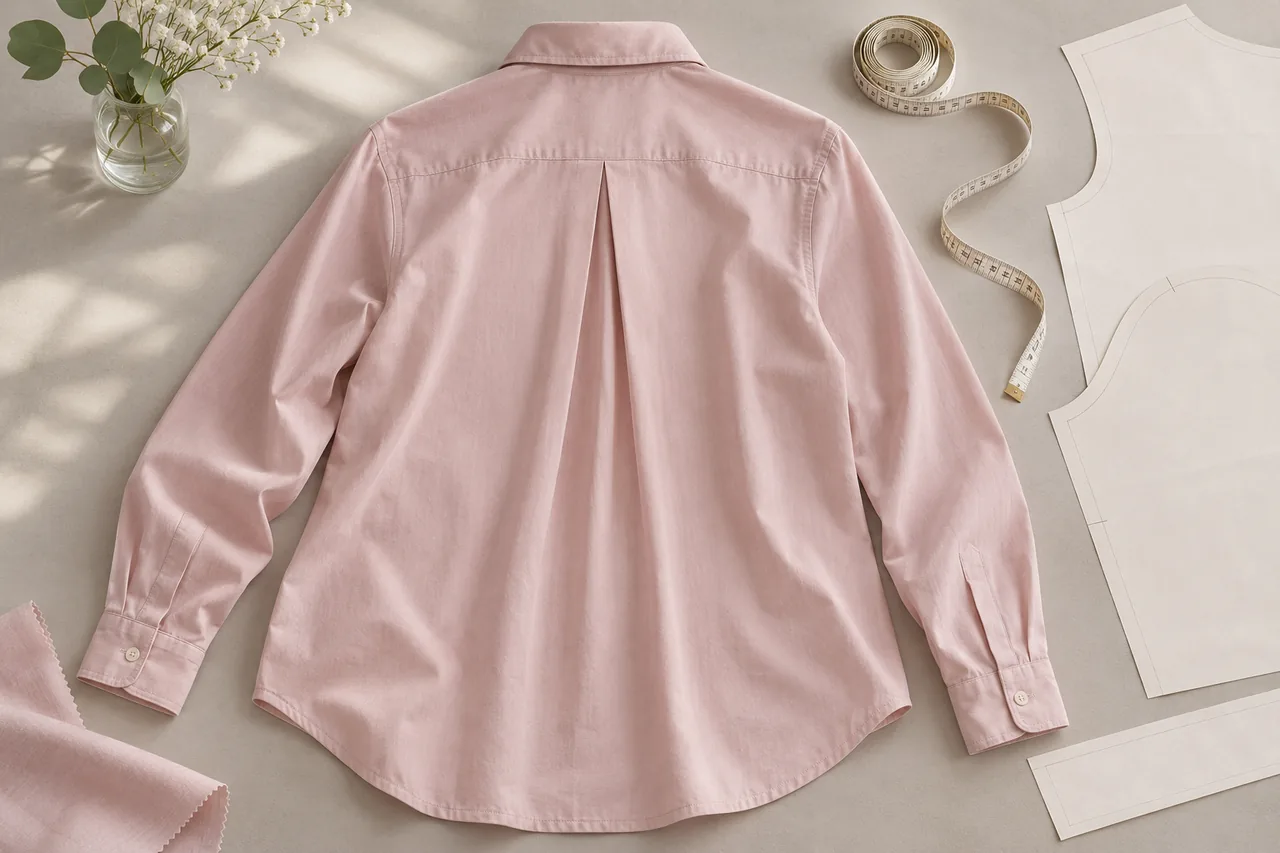
How do you determine the intake and placement of a long back pleat?
Start with the intended silhouette: a naturally falling back, a fuller hem, or more room during shoulder movement. Select the base size and fabric, then mark the pleat placement, expansion, endpoints and fixed section on the back drawing. Adjust the proposal using flat measurements and a fitting, while reviewing chest width, hem shape and fabric drape together.
What can two women's shirt designs contribute to the brief?
The Women's Relaxed-Fit Point-Collar Shirt has a relaxed silhouette and a long inverted back pleat, with a chest patch pocket and wide button cuffs. For a similar silhouette, specify where the long pleat should start, how far it is secured and how much opening you want to see when worn.
The Light Blue Embroidered Pocket Oversized Blouse has a broad center back pleat below a yoke, gentle gathers and a curved high-low hem. For a related design, mark the pleat, gathering area and back hem curve separately, then review how they contribute to the body shape. Each shirt has its own construction; select the details for your own design.
What should the back drawing say about intake and placement?
Use a back flat for the base size and add a detail drawing of the folds. State whether the drawing shows the right or wrong side. The buyer and pattern team set the measurements against the intended sample.
| Item | Record in the drawing and specification |
|---|---|
| Placement and direction | Mark center back, the pleat center or fold lines, fold directions and left-to-right relationship |
| Endpoints and fixing | Reference actual garment landmarks such as shoulder seam, back neckline, yoke seam or hem; mark where the pleat starts, ends, is stitched or released |
| Intake | At a specified height, record the folded pleat-zone width and the fully opened width between the same marks; their difference is the total expansion at that point |
| Appearance | State the visible folded width, edge relationship, symmetry requirement and approved sample or detail photograph |
| Related measurements | Record chest width, hem width, back length and methods; mark any yoke seam and gathering area separately |
| Tolerances and sizes | Agree tolerances for targets and state how placement, expansion and fixed length change across sizes |
Measure along the same horizontal line and between the same marks in both states, without stretching the fabric. Record whether the measurement is on a garment or panel and how seam allowances are treated. For a teaching example, a pleat zone measuring 4 cm folded and 10 cm fully opened has 6 cm of total expansion at that point. These are illustrative values. The Bharat Skills dressmaking guide provides background on folded pleat construction.

How should intake be reviewed alongside the shirt silhouette?
Use the intended fabric and base size to compare local pleat samples for fold direction, fixed length and opening. Then assess a complete shirt for shoulder and back shape, chest width and hem. Identify the fabric swatch, pleat drawing and measurement-chart revisions; keep other conditions consistent when comparing alternatives.
If a fuller hem is desired, ask the pattern team to propose changes to pleat intake or panel shape and record each change. Fabric folded into the pleat is a separate measurement from finished chest width or wearing ease. Measure chest width in the agreed folded state, then assess movement on the wearer. Check the secured section too, because it affects where the pleat can open.
What should be checked flat, fastened and on the wearer?
- Measure flat. Match the sample ID, size, fabric and drawing revision. Lay the fastened shirt naturally in the agreed state. Record chest and hem widths, back length, pleat placement, fixed length and expansion at the specified height against targets and tolerances.
- Review the back. Check fold lines, left-to-right relationship, fixed end and finish. Where the design includes a yoke or gathers, compare the seam, gather distribution and hem curve with the drawing. Photograph the full back and details.
- Fit and move. Fasten the intended size and observe the back and pleat while standing, reaching forward, raising the arms and sitting. Record where fabric pulls or accumulates, separately from flat measurements.
- Recheck after agreed care. If the project includes a post-wash review, record measurements and photographs first. Agree washing, drying and pressing, then repeat the same measurements in the same garment state and compare the pleat and hem.
Decorative pintucks have different count and spacing checks; see the front-and-back pintuck shirt sample guide.
How should revisions and quotations be handed over?
Write each comment as location, observation, target and recheck method. After changing the fixed length, review pleat release, back fit and hem shape together. When intake or fabric changes, update the back drawing, measurement chart, material record and sample ID. Use the revised sample and size-chart guide to check each change on the next sample.
If construction or material changes, ask the factory to update the quotation against the new revision. List buyer-supplied-material processing, the finished garment with factory-sourced materials, and sampling separately. Once approved, hand over the sample, pleat drawing, measuring methods, tolerances and swatch together, and check the first bulk piece against them. The sample-to-bulk consistency checklist covers the wider handover.
Mingsheng Apparel is a custom manufacturer in Dachen Town, Yiwu, Zhejiang, specializing in shirts, Polo shirts and matching sets. It develops patterns and sizes from customer samples, size charts and Tech Packs. Send the back drawing, target silhouette, fabric swatch, base-size measurements and quantity through Mingsheng's OEM/ODM service to discuss a long-pleat sample.
Frequently Asked Questions
How should back-pleat intake be recorded?
At a specified height, measure the pleat zone folded and fully opened between the same marks. Record the difference as total expansion at that point, together with the fabric state, method and agreed tolerance.
Does adding pleat intake automatically increase measured chest width?
Fabric folded into the pleat and finished chest width measured in the agreed garment state are separate records. Check both, then assess shoulder and back movement on the wearer.
What should be rechecked after changing the fixed length?
Review the fixed end and release point, pleat appearance, back fit and hem shape. Link the revised construction drawing, size chart and new sample ID.
How should a long-pleat sample be reviewed after a fabric change?
Link the new fabric swatch to the revised sample and recheck the folded and opened pleat, flat measurements, worn silhouette and any post-care appearance required by the project.